30 April, 2016

Dandelion Root Tea

It's spring! Or at least so say the dandelions around my apartment. I decided to take advantage of the situation to make dandelion root tea. I unfortunately didn't gather many roots -- I was out for about 15 minutes when I was struck by a horrible headache and went back inside. Before I got the chance to dig up some more, the landscaper had mowed the grass and the dandelions with it. They'll be back soon, but I decided to just make a small batch while I wait.

Dandelion Root Tea

Prep time: 10 minutes (not including time needed to dig them up)
Cook time: 1 hour, 20 minutes or 1 day rest followed by 20 minutes cooking
Total time: About an hour and a half

Yield: 20 roots will yield one serving of tea

Ingredients


  • Dug up dandelions, roots intact
Directions

  1. Remove the dandelion roots from the rest of the plant. You can use the rest if you like (the greens can be added to a salad and the flowers can be used to make cordial). Rinse the roots several times, until all the mud has been removed.
  2. Either spread the roots out in the sun for a day (my method) or bake at 200F for about an hour, or until dry.
  3. Bake the roots at 350F for 15-20 minutes, or until roasted brown.
  4. Either chop up the roots or grind them in a coffee grinder or food processor. I opted for the last choice and make a coarse powder the consistency of coffee grounds.
  5. If you chopped the roots, steep them in hot water for 10 minutes to make tea. If you ground the roots, place them in a coffee maker and use them the way you would coffee grounds. 

23 April, 2016

Vegetable Soup

I know it's spring now, but we had a random weekend of snow here, so I decided to make some nice, warming soup to make myself feel better. I used water as a base, but feel free to replace it with a can of vegetable broth.

Vegetable Soup

Prep time: 10 minutes
Cook time: 20 minutes
Total time: 30 minutes

Yield: 4-5 servings

Ingredients


  • 1 tbsp olive or canola oil
  • Bell pepper (green or red are best for this recipe)
  • 2 russet potatoes (about 1 pound total)
  • 12 ounces frozen corn
  • 1 1/2 cups water
  • 1/2 tsp crushed red pepper
  • 1/2 tsp ground thyme
  • 1 cup milk
  • 12 cup shredded cheddar cheese
Directions

  1. Chop the bell pepper and the potatoes
  2. Heat the oil in a large saucepan over medium high heat, then saute the bell pepper until tender, about 4-5 minutes
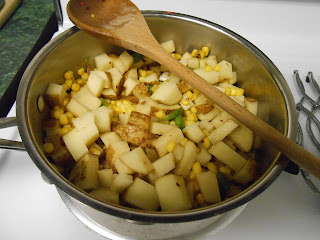
  3. Add the potatoes, corn, water, red pepper, and thyme and raise to high heat
  4. Boil, covered, for ten minutes or until the potatoes are beginning to soften
  5. Stir in milk and cheese and serve

16 April, 2016

Almond Slice

I actually have no idea what a "slice" is in the context Redwall uses. I believe it's basically a "bar," or something sweet that is made in a square or rectangular pan and sliced into portions. For the almond slice, I decided to base the recipe off of a no-bake cheesecake. It came out pretty nicely. Leftovers can be frozen, but I don't recommend keeping these around for too long after making them.

Almond Slice

Prep time: 15 minutes
Chill time: 1 hour
Total time: 1 hour, 15 minutes

Yield: 16-24 servings

Ingredients


  • 8 graham cracker sheets
  • 3 tbsp butter
  • 1/4 cup ricotta cheese
  • 8 ounces cream cheese
  • 1 cup ricotta cheese
  • 1 tbsp honey
  • 1 tsp vanilla extract
  • 1/2 cup sliced almonds
Directions

  1. Place the graham crackers in a zipped bag and smash them with something heavy until you have fine crumbs
  2. Pour the crumbs into an 8x8 baking pan. 
  3. Melt together the butter and the 1/4 cup of ricotta, mix into the crumbs, and press everything into an even layer in the pan. 
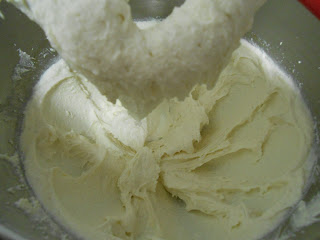
  4. With an electric mixer, beat together the cream cheese, cup of ricotta, honey, and vanilla until light and fluffy. 
  5. Pour the cheese mixture into the pan and smooth into an even layer
  6. Top with the sliced almonds
  7. Refrigerate for an hour before attempting to cut. After cutting, you can store these in the freezer and either thaw before serving or just serve frozen -- they're good both ways.

09 April, 2016

Deviled Barley Pearls

Deviled barley pearls were introduced to us right off the bat in the book Redwall. Now the only food I've ever heard as being "deviled" is deviled eggs. I wasn't certain what exactly makes deviled eggs deviled, so I looked up the definition. Apparently, "to devil" in cooking means "to prepare food with hot or savory seasoning." Well, that pretty much covers anything I could to barley, so I decided to prepare it risotto style. This recipe takes a lot of hands-on time, but it's simple. Most of the time is just taken giving the pot an occasional stir, so don't be intimidated. If you have the time, it's well worth it.

Deviled Barley Pearls

Prep time: 10 minutes
Cook time: 50 minutes
Total time: 1 hour

Yield: 6 servings

Ingredients


  • 1 tbsp oil (I used olive)
  • 1 white onion
  • 1 cup pearled barley (I found this in the kosher section, not in the grains section)
  • 1 tsp dried thyme (I didn't try it, but I bet sage and rosemary would be nice additions, as well)
  • 4 cups vegetable broth
  • 1 pound fresh mushrooms (I used portobello, but use your favorite)
Directions

  1. Dice the onion and slice up the mushrooms
  2. Heat the oil in a medium saucepan over medium heat
  3. Add the onion and saute until it starts to turn translucent
  4. Stir in barley and thyme
  5. Add about a cup of the broth
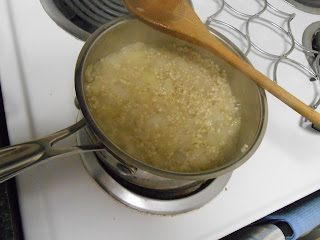
  6. Allow barley to cook, stirring frequently, until the liquid is absorbed
  7. Continue steps 5 and 6 until the broth is gone and barley is tender
  8. Stir in the mushrooms and heat through

02 April, 2016

Blackberry Jam Roly Poly

A roly poly, also known as a Swiss roll, is a flat sponge cake that's been covered in some sort of filling (in this case, blackberry jelly) and rolled up into a spiral to be sliced. I almost didn't post this because...well...I done messed it up bad. But it still tasted really good, so I decided I would post it anyway and just post a warning about how to NOT make the same mistake I did. The number one thing to be successful when making roly polys (polies?) is to use the thinnest parchment paper you can find. It turns out that the cheap, off-brand parchment paper I bought is thicker than most. Why does that matter? If your parchment paper is too thick, it won't be flexible enough to lay flat in the corners of your sheet pan. This will keep your batter from spreading far enough, which will make your sponge too thick, which will lead to breaking when you try to roll it (thinner sponges will flex more before breaking apart). So if you're smarter than I am, this should work out fine. If not, you'll end up with an ugly but tasty dessert.

 Blackberry Jam Roly Poly

Prep time: 10 minutes
Cook time: 10 minutes
Cool time: 10 minutes
Total time: 30 minutes

Yield: about 8 slices

Ingredients


  • 1 1/2 cups flour
  • 1 cup sugar
  • 1 tsp baking soda
  • 2 tsp baking powder
  • 3 tbsp melted butter
  • 1 tsp vanilla extract
  • 1 tsp apple cider vinegar
  • 1 cup milk
  • Blackberry jelly or jam (about 1 cup, but just add as much as you want)
Directions

  1. Preheat oven to 350F
  2. Whisk together flour, sugar, baking soda, and baking powder
  3. Whisk in melted butter (I forgot to take a picture here, but you'll end up with a clumpy-ish dry paste)
  4. Whisk together vanilla, vinegar, and milk, then pour into dry ingredients and mix until smooth (batter will be thin)
  5. Line a 9x13" baking sheet (one with a lip) with THIN parchment paper
  6. Pour batter into sheet and spread evenly over the entire surface
  7. Bake for about 10 minutes, or until golden brown. 
  8. Let the sponge cool completely (about 10-15 minutes) on a cooling rack before removing from the baking sheet to invert it over another piece of parchment paper
  9. Peel away the used parchment paper
  10. Cut away any hard or overbaked edges to make an even rectangle
  11. Cover the surface of the sponge with jam or jelly
  12. Slowly roll the sponge into a spiral and slice into rounds (don't worry if this step turns into a disaster; it will still taste good!)